
Once your cookies are baked, it’s time to decorate them! To do this, you can use piping tips or spread a layer of frosting over the top. You can also add candy decorations, like mini marshmallows or chocolate chips. The possibilities are endless, so get creative! Here are some ideas for decorating your Halloween cookies!
Easy sugar cookie icing
If you’d like to decorate your Halloween sugar cookies, here are a few easy ways to do it. You can paint it on using a food-grade brush, or pipe it on with a piping bag fitted with a wide tip. Allow the icing to set at room temperature before decorating.
To make skeleton faces, use white icing to pipe a circle around the cookie and then spread it out with a toothpick. To decorate them with skeleton features, add eyes, nostrils, and mouth shapes. Alternatively, you can use green icing to make an iris and add a black pupil.
To create detailed cookie designs, you’ll need patience. You’ll need to let each layer dry before applying the next. For example, you’ll need to pipe a pumpkin with two outer segments first, and wait an hour to add the center. This will help the pumpkin appear three-dimensional. Pipe ghosts, cauldrons, and other details after the icing has dried.
No-bake Halloween cookies
No-bake Halloween cookies are a fun and easy way to celebrate the upcoming holiday. These treats are quick to make and are perfect for kids’ parties. You can create the perfect treat with only 4 ingredients! There are no complex recipes or rules to follow; just add sugar and a little creativity and you’re good to go.
These cookies can be decorated in a variety of ways. Kids can make bat cookies that are easy to decorate and are completely customizable. These cookies are great for Halloween and all other holiday celebrations. You can even print out a bat cookie template and use it as a guide to make a spooky treat. These cookies can also be made in three-dimensional shapes or dipped in melted chocolate for a more spooky effect.
Spooky cake pops
If you want to make Halloween cake pops, you need a few decorating tips. You can use black nonpareil sprinkles and white chocolate to create a spooky, ghostly design on your cake pop. Once your Halloween cake pops are done, you can add a mummy, pumpkin, or spider to them.
The most common way to cover cake pops is with candy melts. These confectionary coatings have long shelf lives. Depending on the brand, they can last for up to 10 years. Always check the label before using a candy melt. Make sure it is tempered or you may end up with a crumbly chocolate.
To make the Halloween cake pops, start by breaking up a store-bought chocolate fudge cake. It should resemble dough, so break it into small pieces and roll it into balls. Then, fix a stick with melted chocolate. Let the pops cool before adding candy. You can use orange, green, and purple candy melts to create spooky effects. To finish the look, add candy eyes and sprinkles.
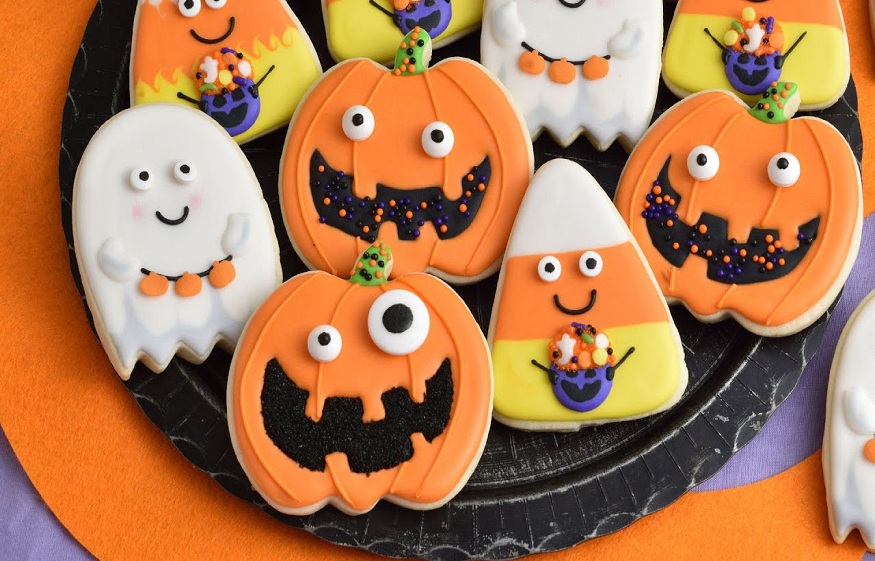
Spooky Face Halloween Sugar Cookies
Decorating Halloween cookies with Spooky Faces is one of the most fun aspects of the holiday. These tasty treats are perfect for parties or costume parties, and are simple enough to make and decorate yourself. The cookies also look fun in larger dessert spreads. The best part is that these cookies are easy to prepare and bake, and take very little time.
First, you need a couple of basic supplies. You’ll need gel food coloring, which comes in a variety of colors. For a more natural option, you can also opt for plant-based food coloring. Other supplies include sprinkles, black jimmies, and orange sanding sugar.
Neon Halloween Sugar Cookies
This Halloween season, add some fun to your cookie decorating by making neon sugar cookies. These fun cookies can be made with a few simple ingredients. The dough for these cookies is soft and full of vanilla flavor. To make the cookies, line a baking sheet with parchment paper or silicone mats. In a large mixing bowl, combine the cake mix with the oil and eggs. Scoop the dough onto cookie sheets, and allow it to cool before frosting. Once the cookies have cooled, tint frosting with neon green gel food coloring.
Make the dough for the cookies at least an hour before baking. This will help prevent the cookies from spreading out in the oven. Also, chill the dough completely before sprinkling the sprinkles. After baking, let the cookies cool for 5 minutes before transferring to a cooling rack. You can also freeze the dough in an airtight container for up to 5 days to make them into party-worthy treats.